The Navionics Boating App on a mobile device or tablet is a really nice way to quickly and easily create boating “routes”. The Navionics App has a much better user interface than is found on most of the current marine chart plotters and is also a great ‘backup’ device if something were to go wrong with your main chart plotter.
I use the Navionics boating app on a dedicated iPad. After some experimentation I found I needed to have an iPad that is setup to have a wireless “SIM” card as apparently these iPads have additional circuity to pickup GPS signals that is missing from the iPads without the “SIM” card capability. Note that you don’t have to have a SIM Card installed for the full GPS functionality to work. I’m still mystified as to why Apple set it up this way – seems strange to me.
Working out how to transfer a route from the Navionics App to a B&G Chartplotter took quite a while to figure out – and is very poorly documented by either Navionics or B&G – but its a super useful capability as creating routes on a chartplotter is painful at best.
Here are the steps:
Step 1: Connecting to your Chartpoltter.
First thing is to ensure that your mobile device can connect to the B&G Chart Plotter. The easiest way to do this is on the Zeus Chartlotter – go to the settings menu and choose Wireless (Home/Settings/Wireless). Next open the “Hotspot settings” and setup the “Network Name” and “Network Key” (Password) to names that makes sense for your boat – and make a note of them as you will need to enter these values on your mobile device. Finally – make sure the “Built-in hotspot” is enabled/checked.
Once you have done that go to the wireless settings on you mobile device and connect to that Hotspot network.
When you start the Navionics Boating app – look for the “Paired Devices” in the main menu and after a short while you should see it connected to your chartplotter.
Step 2: Syncing your route.
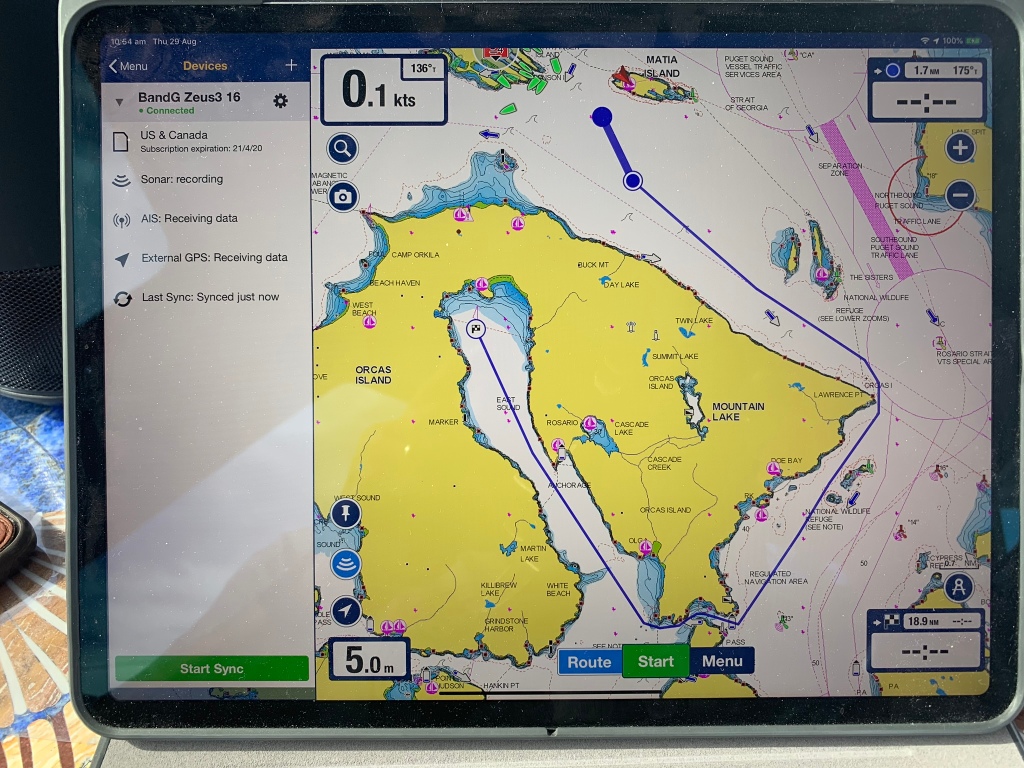
Once you have your mobile device connected – next step is to synchronize the data in Navionics with the Zeus Chartplotter. At the bottom of the devices page there is a button to “Start Sync” – clicking that activates the sync.
Make sure you have setup a route in the Navionics Boating app – and given the route a sensible name – that you can find easily in your chart plotter. I find that the automatic routing can be very handy for most routes – there are some places where some extra care is required – and you need to inspect the route carefully. The example above is an automatic route around the eastern side of Orcus Island – and through quite a narrow channel into “East Sound”. I use a reverse date name for all my routes – as that way they list out chronologically – for example “Route 2019-08-29”.
Step 3: Importing the route into your chartplotter.
Next you need to go to the chart plotter – and go to the Home Page then in the list on the left of the home page scroll down to find “Storage”. Click on that – then click on “Memory card – top” then the folder “Archive”. When you pressed “Sync” on your mobile device – it updated a file here called “All_Routes.gpx” as well as adding each individual route into the folder called “Routes”.
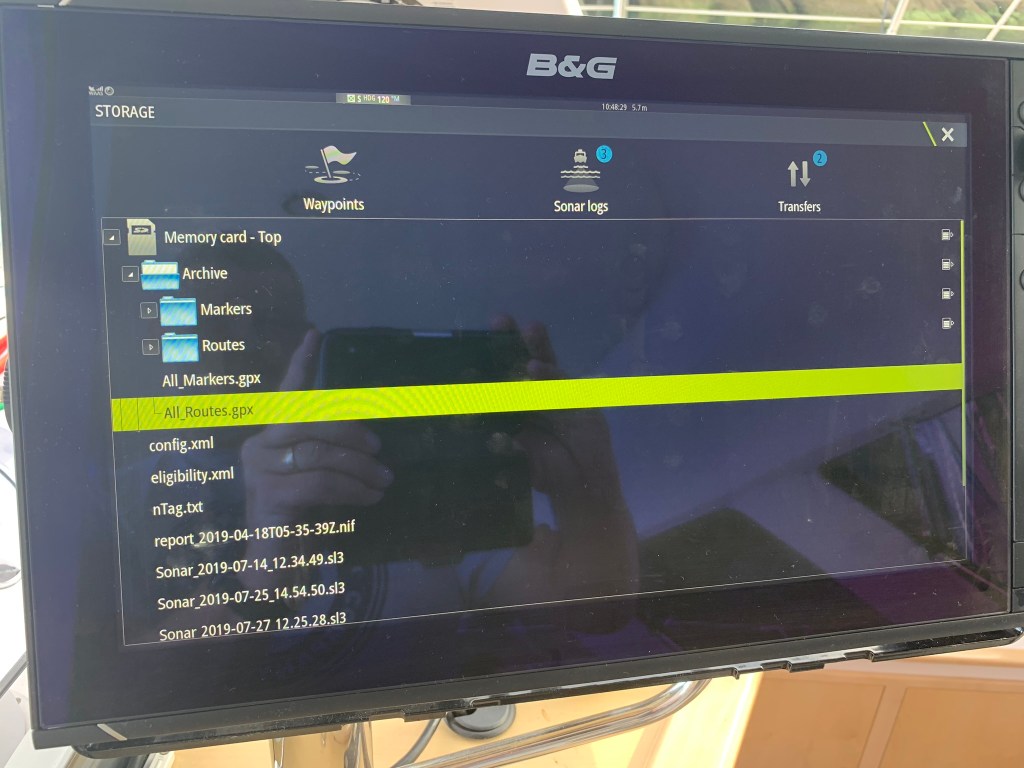
Next navigate into the Routes folder and select the route you would like to import.
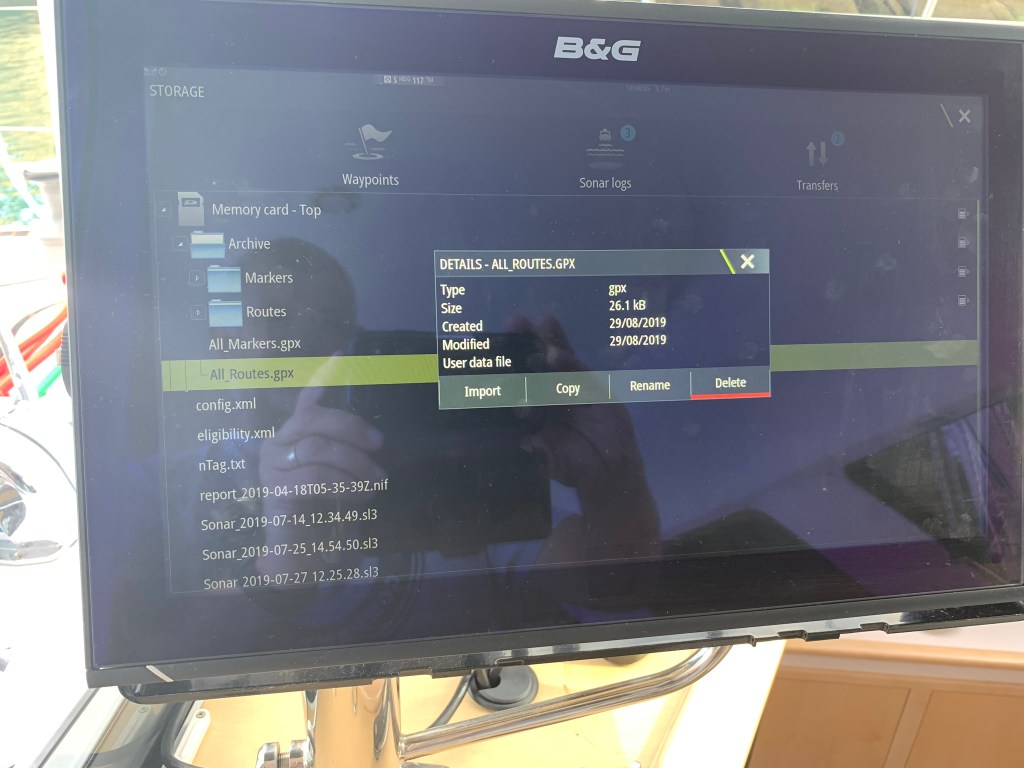
Click the “Import” button and the route will be imported into your chartplotter.
Step 4: Viewing and activating routes in your B&G Zeus Chartplotter.
After the route has been imported go back to the home screen on the chartplotter then select “Waypoints” from the menu list on the left of the screen. Next click on the Routes tab on the top of the page and you should see the route you just created somewhere in that list of routes.
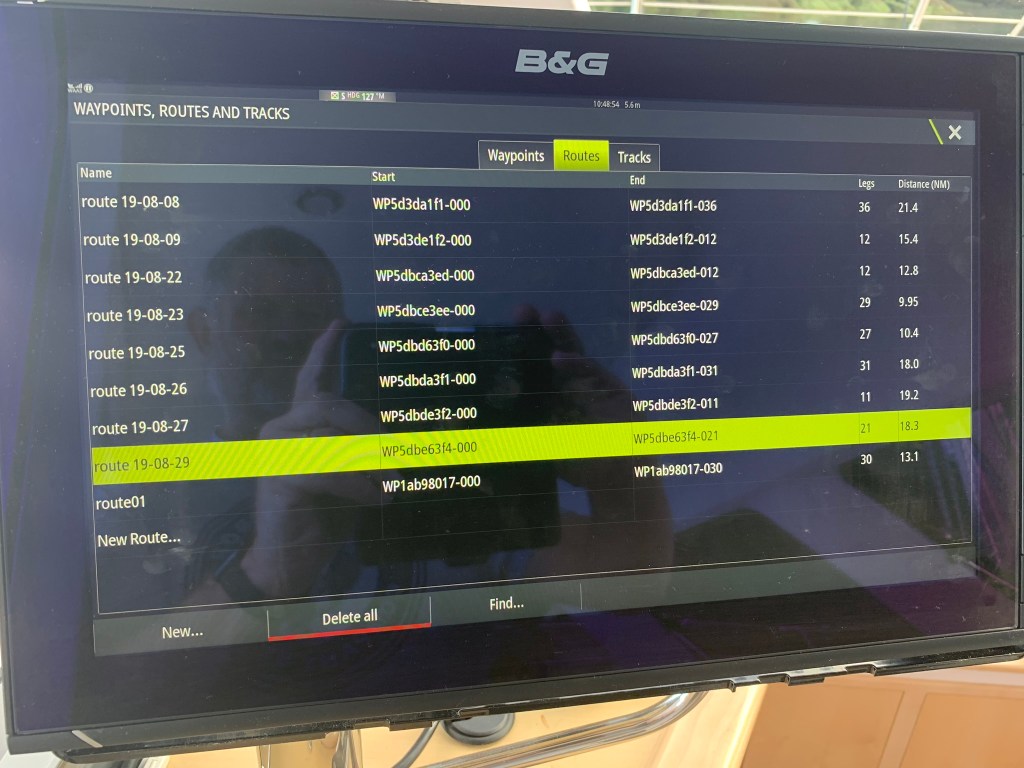
Click on the route brings up a summary showing all the route waypoints and a menu item at the bottom to “Start” the route. It gives you the option to start in “Forward” or “Reverse” mode.
I’ve recently had issues with large complex routes causing the B&G Chartplotter to reboot. I’d recommend trying to keep your routes to a max of around ‘200 legs’. The number of legs can be see on the Route summary page. We had a route with 400 legs that caused frequent chart plotter reboots.
Skipping route waypoints.
Something important to note with the routes is that whenever you start a route in the chartplotter – it always from the first waypoint. Normally this is fine – but if for some reason you have already moved beyond the waypoint the “active” waypoint will actually be behind you – which is pretty annoying and poor design by B&G – in my opinion. To get around this you need to “skip” to the next waypoint – and you may need to skip several waypoints to catchup to your current position.
To skip a waypoint – first make sure your chart is displayed and the route is visible on the chart. Next click on the “Options” menu (3 horizontal lines – on second row) on the chartplotter buttons. The third option on that menu will be “Navigation” – click on “Navigation”
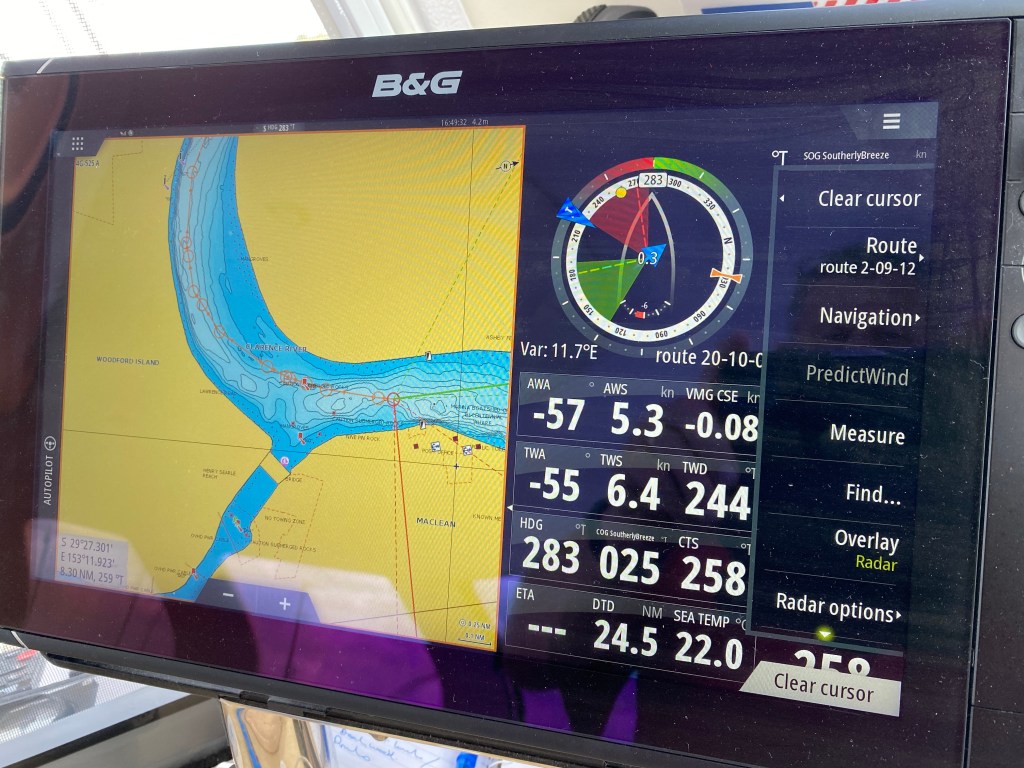
Once you have clicked on “Navigation” you will see the navigation sub-menu with the choice to “Skip” a waypoint. You can skip through as many waypoints as you need to catch up to your current location. Be careful as there is no “Go back” option only a restart.

I hope this all made sense – I’ve found it very useful over the past few year. I’m still baffled why they (Navionics and B&G) have not done more to both streamline and document this themselves.
Skipping Waypoints – Update Oct 2022
After a lot of research I have found a much easier way to start a route from a given waypoint. This is really important if you have a long route with lots of waypoints – and for some reason you need to restart your chartplotter.
The trick is to first start the route normally – then find and select the next waypoint. With the next waypoint highlighted go to the Navigation Menu – and you should see an option listed to “Start from nnnWaypoint” – and click on that. That will jump you forward to that waypoint.
Shocking UX design by B&G – but much nicer than clicking through lots of older waypoints.
Happy Sailing!
