I have had to replace a broken reefing line a few times now – twice on my 1260 and recently on our new 1370. The hard part is feeding the new reefing line through the boom – and particularly getting it through the correct channel at the mast end of the boom. It took me quite a while to figure out how to do this – but eventually came up with a technique that seems to work.
At the neck of the boom – there are 3 separate channels with dividers that run inside the boom for aprox 200-250mm. Each reefing line runs through one of these channels. This means that you cannot simply attach a mousing line to one of the other reefing lines as the mousing line will be pulled through the incorrect channel. What you need to do is somehow feed a mousing line inside the correct channel – then ‘hook’ it back out through one of the other reefing line channels – so it can then be tied off on that reefing line – then pulled through the boom.
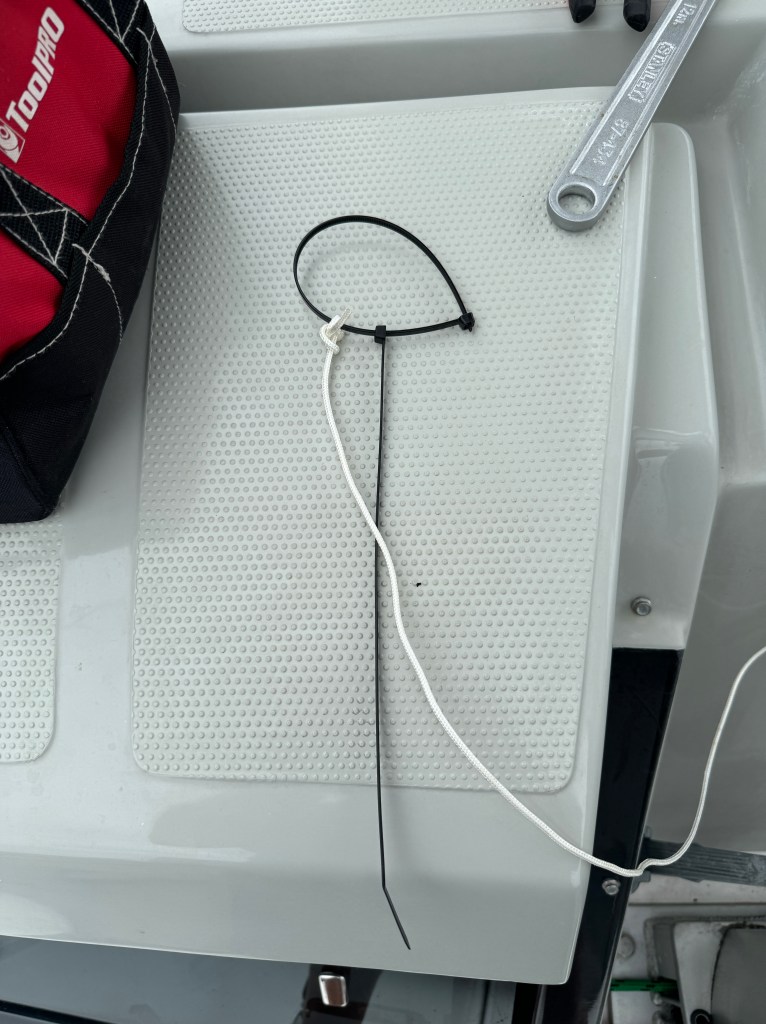
First – I created something that I could insert down one of the channels with the mousing line attached – that I could hook and pull back out the next channel. I used to large 12″ cable ties – which are ideal of this purpose.
The rest is pretty straight forward – simply pull the reefing line through the boom with the mousing line attached – you need to remove the blocks at the stern end of the boom – and use your hook to fish out the mousing line.
Good luck – hopefully this helps.
I did have a very long electrical cable mousing device with me on the 1370 but we were not able to get that past several of the obstructions inside the boom – despite trying for several hours.
Here are a few useful settings for configuring your B&G Zeus Chart plotter. In no particular order:
Chart Look Ahead
View a chart – then select the Options menu – More Options – and select Look Ahead. This positions your boat so that the majority of the chart displays information in front of your boat – rather than the default showing your boat in the center of the display.
Align your Radar
Settings – Radar – Installation – Adjust Bearing Alignment. Ideal to do this when you have a few AIS targets nearby – so you position the radar image directly over the AIS target.
Chart Extension Lines
Settings – Chart – Extension Lines. If I am cruising I like to have my boats extension lines set to 30min – and same for other vessels. I also like to display both Heading and Course over Ground. The difference between the end points of Heading and COG is the speed and direction of the current.
Set Autopilot to continue current course when engaged
The default setting for the B&G Autopilot is to “Center” the steering when the Autopilot is engaged. This can be pretty annoying as often this changes your current course by 10 to 15 degrees. I always change this setting to “Actual” which keeps the current course.
Setting is Main Menu – Settings – Autopilot – Steering – then the setting is under both Low Speed and High Speed – Init Rudder.
Other Items
Its really worth calibrating both the Heading and Speed Log. These settings are found under Main Menu – Settings – Network – Calibration. I have a separate post on calibrating boat speed which can be found here https://copelands.blog/2023/03/11/calibrating-boat-speed/ .
There are some very good articles on the B&G Web Site on setting up and configuring a Autopilot – but unfortunatley they are very difficult to locate. Here they are:
A very simple way to calibrate your boat speed (readings from your paddle wheel) is to use your trip distance (Home Page / Trip Caculator) measurements on your chart plotter (Distance over Ground & Distance through Water) by sailing for say 10 min in one direction – then turn through 180 degrees and sail back to where you started. You can then look at the 2 distance measurements to caculate the speed calibration factor.
The nice thing about this technique is that it eliminates the impact of current or tide because you travel back to where you started. That said – obviously its best to calibrate the boat speed where you have minimal current or tide.
1) Goto the Boat Speed calibration page (System / Network / Calibration ) and set the boat speed calibration factor to 1.0
2) Go to the Trip Caculator (Home page – Trip Calculator on left menu) page on your chart plotter:
3) Position your boat at the start location – best to be adjacent to a landmark – ideally avoid any strong currents.
4) Reset the trip settings so TRIP and DSTWTR is zero.
5) Motor at around 5-6 kts for aprox 10 min in a straight line then turn through 180 degrees and head back to your start location.
6) Have a pen & paper handy – when you get back to the start location note down the TRIP and DSTWR readings.
7) Lets asume the TRIP distance is 0.8 and the DSTWR is 0.75. Divide the TRIP Distance by DSTWR so 0.8 / 0.75 = 0.9375 is the Calibration factor. Enter that number into the Calibration setting.
8) If you have multiple Chartplotters – I believe that you will need to enter that Calibration number into each device.
9) With that number recorded in the Calbration setting – repeat the test if you have time. Ideally the TRIP & DSTWR should be very similiar readings. You can adjust the Calibration number up or down to fine tune.
Personally – I found my paddle wheel transducer to be quite unreliable. In 2022 I swiched over to an Airmar Ultrasonic Speeed/Depth/Temp transducer – which I have found to be super accurate. https://www.airmar.com/productdescription.html?id=208
Finially – I’d strongly recommend that you also Calibrate your B&G Digital compass regularly. I have found that they can “drift” out of calibration – particularly if you travel a reasonable distance.
To calibrate the Precision 9 Compass:
Go to (System / Network / Device List) and find the Compass. Select the compass and you should see a “Calibrate” menu item. Choose Calibrate – and follow the on-screen instructions. It requires you to turn the boat slowly through a 390 degree turn. At the end of that turn the compass will have been Calibrated.
This is a nice way to setup your chart plotter for sailing. I note the the Outremer 55 Cat “Great Circle” uses a very similar setup.
In addition to the chart plotter you would often have 2 other Triton 4″ displays. One of these would be showing the Autopilot settings including heading, rudder angle etc. On the second display I like to show the TWS & TWD wind history for aprox 30 min.
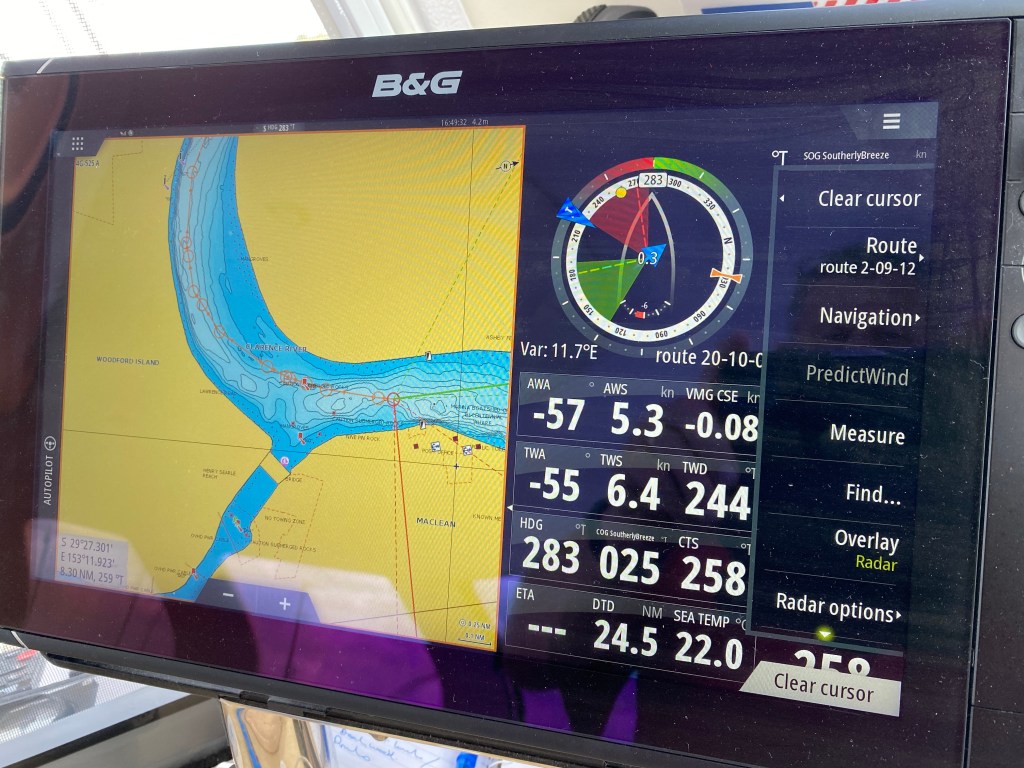
This page is made up using four seperate “panels” that can be configured very easily using the View Builder on the home page of the B&G Chart Plotter.
Panel 1 is the chart view.
Panel 2 is the SailSteer display – which displays both the Aparent & True Wind angles as well as current speed and direction
Panel 3 is a Dashboard display – which is underneath the SailSteer panel
Panel 4 is a “global” side bar panel on the Right Hand Side.
SOG – Speed Over Ground: This is the speed from your GPS device.
STW – Speed Through Water: This is the speed your boat is doing through the water – which factors in local tides and currents. This is the most important speed reading – and is what is used in the Polar performance diagrams.
The STW is calculated using the paddle wheel (or ultrasonic) sensor under the hull of the boat. Its super important to make sure this is calibrated accurately.
Importantly STW is used to calculate both True Wind Speed, True Wind Direction & True Wind Angle – so even more reason to ensure that your boat speed is accurate.
There is a B&G setup setting which also allows you to use SOG to compute TWD, TWS & TWA. I’ve be very careful when using that setting as it can be very confusing.
Note: I have discovered recently that “Boat Speed” can display either “Speed through Water” or “Speed over Ground” – so be very careful with using this value. Boat speed will actually show what ever has been selected in settings to calculate True Wind Speed. I’d strongly recommend not using “Boat Speed” and use the “Speed through Water” value – as that is very explicit.
FWD Depth: On my boat I have a Forward Scan depth scanner which is under the port hull – so this is the depth under the port hull.
DEPTH: This is the main depth sensor mounted under the stbd hull. Make sure you configure the depth to account for the offset below the water line of the sensor.
POS: This is the latitude & longitude of the boat. I always like to leave this here in case of an emergency and you need your location in a hurry.
WPT DIST – Waypoint Distance: The distance to the next waypoint on your course.
Sea Temp: Water tempreature
Sail Dial: Lots of useful visual info on this diagram A) shows the Aparent Wind Angle T) Shows the True Wind Angle. The arrow in the middle shows the current/tide direction & speed. The small white arc under the arrow shows your rudder angle. The Red & Green dashed lines show the Port & Stbd tacking angles
AWA – Aparent Wind Angle:
AWS – Aparent Wind Speed:
VMG – Velocity Made Good: I beleive this is yoru speed towards your next Waypoint – but need to check that.
TWA – True Wind Angle:
TWS – True Wind Speed:
TWD – True Wind Direction:
HDG – Heading: This is the direction your boat is travelling through the water. This will be the “black” projection line from the boat shown on the chart
COG – Course over Ground: This is the direction the boat is heading – factoring in current & tide. If there is a strong cross current you will be swept sideways. This is displayed as the “blue” projection line on the chart.
Time: Your local time
ETA – Estimated Time of Arrival: The Estimated time of arrival at the end of your current route.
WPT Bearing: The bearing to your next Waypoint.
TTW – Time to Waypoint: The time to the next Waypoint.
This is a list of items that we have found very useful to have on your Seawind Catamaran. In no particular order:
Item
Description
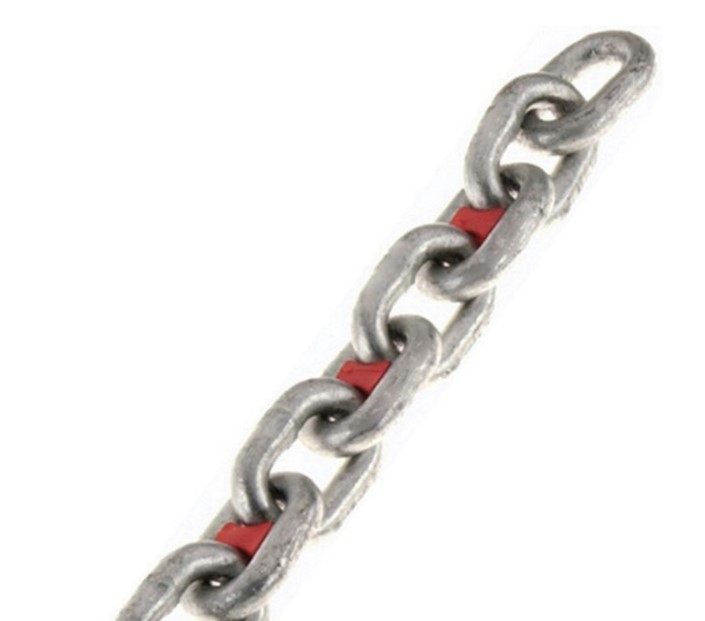
Anchor Chain Markers
Chain Markers in several different colors. Put 3-4 of one color every 10m of your anchor chain so you can quickly see how much chain you have out. They come in 2 different sizes – one for 8mm and another for 10mm chain – so make sure you purchase the correct size. I have found that they stay in place pretty well – but you do need to have 3-4 together so you can see them easily.
I have found the chain counters can be unreliable – they are fine when they work – but you need a good backup method as knowing how much chain you have out is rule #1 when anchoring. I also like to stand up the front of the boat when anchoring – and typically the anchor counter is back at the helm – so these work well when watching the chain go in/out.
The Mantus chain hook is the best way to attach your anchor bridlle to the anchor chain. Its pretty much unbreakable and easy to attach / remove. I have broken several other types of chain hooks – which is never fun – particularly when the wind is really howling.
I have owned several sets of these Fuji Mariner Binoculars – they are fantastic value for money, really great image quality and have a compass built in. I think they are much better than binoculars that cost 2-3x more. One thing that always impresses me is that they do not require focusing.
Having a range/distance finder can be super handy when anchoring – particularly in a tight anchorage – or when some idiot anchors too close to you. Its a great way to figure out if someone is moving/dragging closer – and settles many argiments pretty quickly.
Search for range finder on Amazon. Should be around $90.
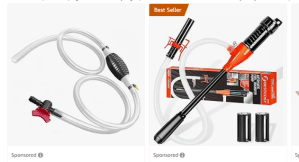
Siphon
In Asia you need to be able to fill your fuel tanks from Jerry Cans as many locations do not have fuel docks. Pick up a siphon from Amazon.
I have experimented with a few different night vision systems. I have found this hand held Flir Ocean Scout camera works really well – and I prefer that its hand held – makes it very easy to look around. Visibility at night through these is very good.
We love these Hobie Inflatable Kayaks. The pedal system really powers you through the water very efficently. Being inflatable – they can be stored away pretty easily as well.
This Exposure Lights head torch is designed for sailing. It has both a red and white light and is rechargable. I brought mine from Amazon – but seemed unavailable at the moment.
These solor powered lanterns are really useful. They have a very nice light quality – that is also dimmable. In a really crowded anchorage I hang one of these on the front of the boat overnight as well as leaving one running in the cockpit.
We have found these Pappelina Swedish made plastic rugs perfect for use on a boat. They can be washed and cleaned easily – and look & feel really nice. Not cheap – but great quaility.
The Airmar Ultrasonic speed / depth / temp transducer is a much more accurate and reliable way to measure your boat speed. Its designed to replace the Airmar paddle wheel for measuring speed through water. The problem with paddle wheels is after a while the get blocked or clog up. The ultrasonic log has no moving parts – it can just measure water particles flowing accross its surface.
I have also found these ultrasonic logs are super accurate as well. When I have calibrated them on my last boat its calibration factor was 1.0 – meaning it measured exactly the same as the GPS. Paddle wheels are typically between 0.90 to 0.95 in my experience.
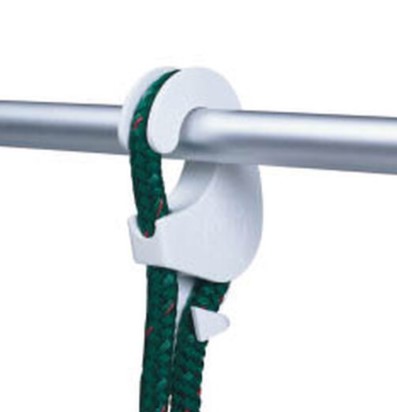
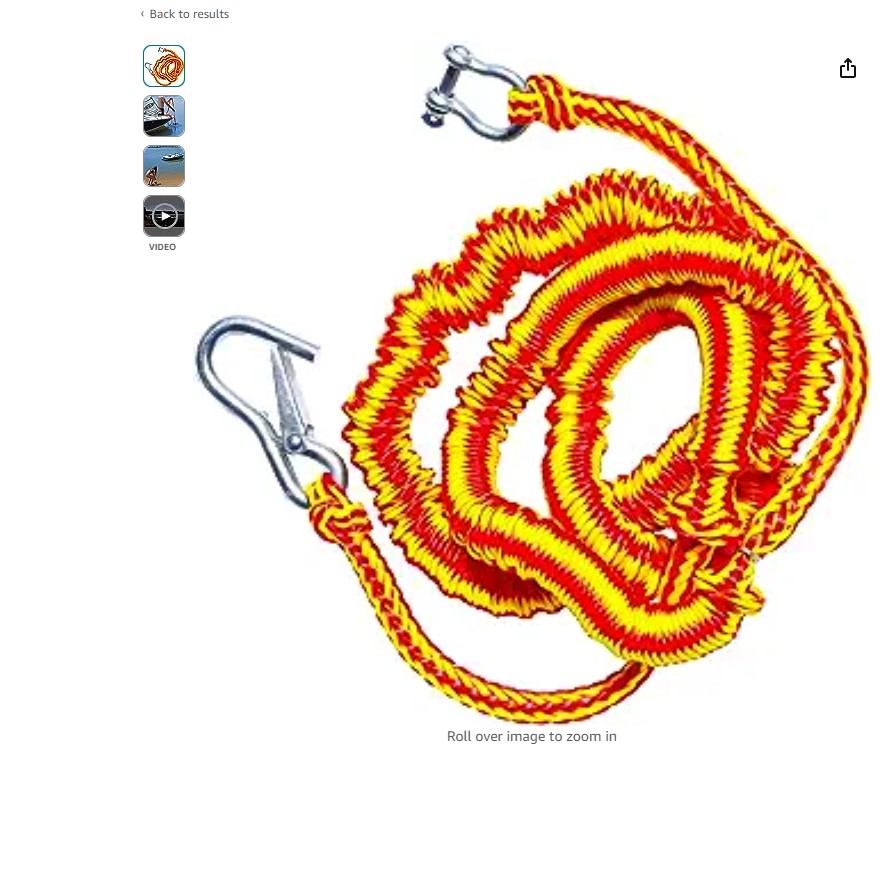
An Anchor Bungee is super useful on your dinghy to use with a second anchor to anchor your dinghy just off a beach. You can buy at Amazon or most decent sized boat chandlery’s.
Sentinel Marine provide a great on boat monitoring system that integrates with both NMEA 2K and CZone. It has a built in SIM card and synchronizes all boat data to a cloud based storage system. This enables you to view key data (Wind Speed, Depth, Battery Status, Solar) from your boat remotely. It also has a very nice “trip” log, usage graphs and can be integrated with security & bilge alarms.
The Navionics Boating App on a mobile device or tablet is a really nice way to quickly and easily create boating “routes”. The Navionics App has a much better user interface than is found on most of the current marine chart plotters and is also a great ‘backup’ device if something were to go wrong with your main chart plotter.
I use the Navionics boating app on a dedicated iPad. After some experimentation I found I needed to have an iPad that is setup to have a wireless “SIM” card as apparently these iPads have additional circuity to pickup GPS signals that is missing from the iPads without the “SIM” card capability. Note that you don’t have to have a SIM Card installed for the full GPS functionality to work. I’m still mystified as to why Apple set it up this way – seems strange to me.
Working out how to transfer a route from the Navionics App to a B&G Chartplotter took quite a while to figure out – and is very poorly documented by either Navionics or B&G – but its a super useful capability as creating routes on a chartplotter is painful at best.
Here are the steps:
Step 1: Connecting to your Chartpoltter.
First thing is to ensure that your mobile device can connect to the B&G Chart Plotter. The easiest way to do this is on the Zeus Chartlotter – go to the settings menu and choose Wireless (Home/Settings/Wireless). Next open the “Hotspot settings” and setup the “Network Name” and “Network Key” (Password) to names that makes sense for your boat – and make a note of them as you will need to enter these values on your mobile device. Finally – make sure the “Built-in hotspot” is enabled/checked.
Once you have done that go to the wireless settings on you mobile device and connect to that Hotspot network.
When you start the Navionics Boating app – look for the “Paired Devices” in the main menu and after a short while you should see it connected to your chartplotter.
Step 2: Syncing your route.
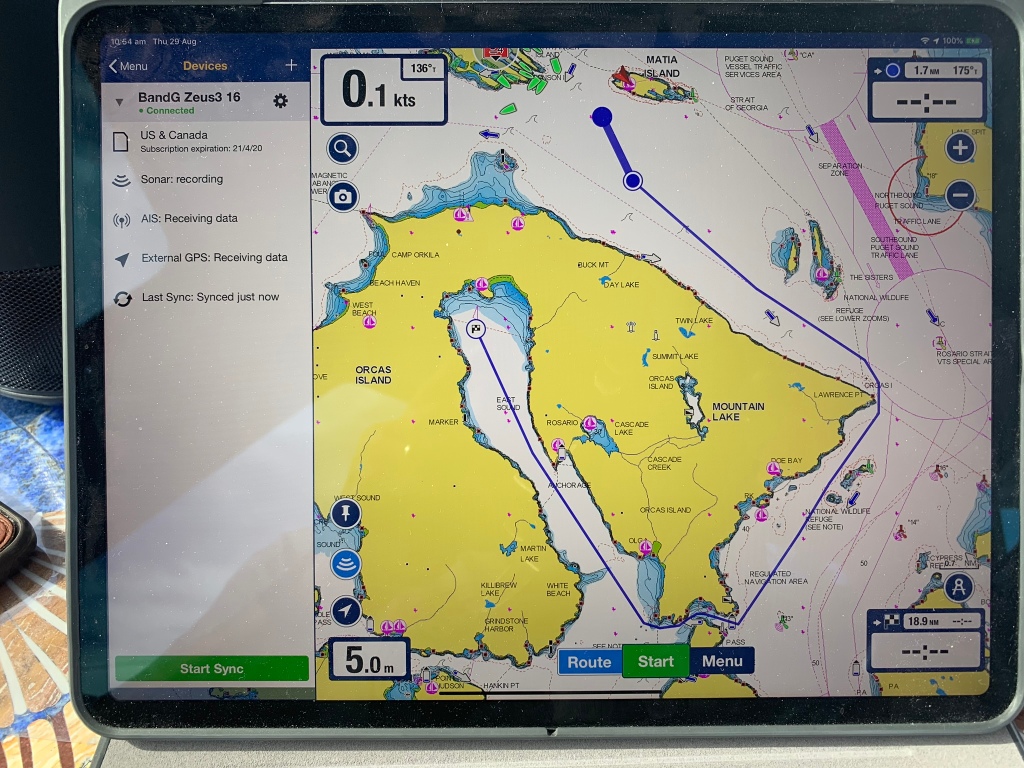
Once you have your mobile device connected – next step is to synchronize the data in Navionics with the Zeus Chartplotter. At the bottom of the devices page there is a button to “Start Sync” – clicking that activates the sync.
Make sure you have setup a route in the Navionics Boating app – and given the route a sensible name – that you can find easily in your chart plotter. I find that the automatic routing can be very handy for most routes – there are some places where some extra care is required – and you need to inspect the route carefully. The example above is an automatic route around the eastern side of Orcus Island – and through quite a narrow channel into “East Sound”. I use a reverse date name for all my routes – as that way they list out chronologically – for example “Route 2019-08-29”.
Step 3: Importing the route into your chartplotter.
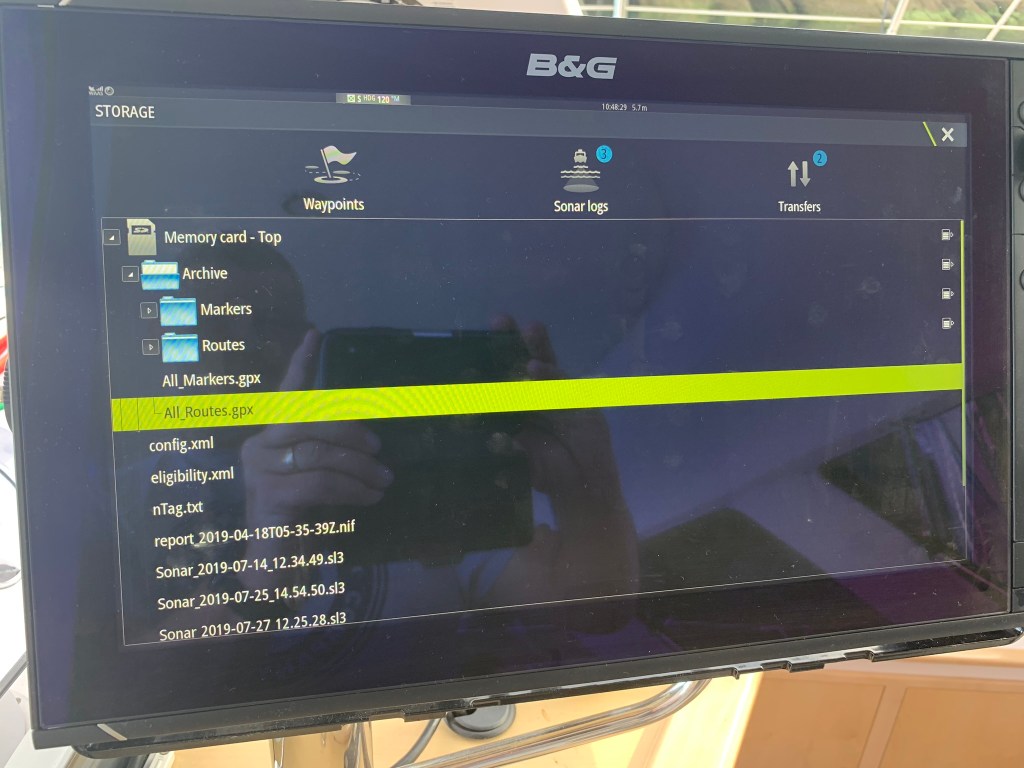
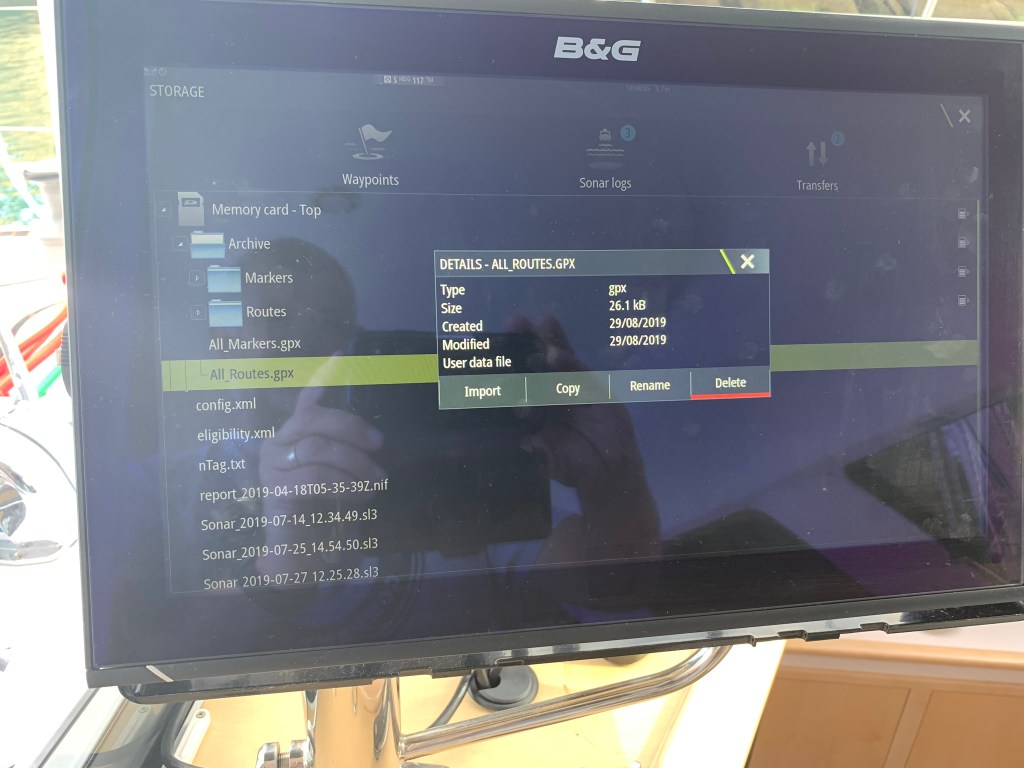
Next you need to go to the chart plotter – and go to the Home Page then in the list on the left of the home page scroll down to find “Storage”. Click on that – then click on “Memory card – top” then the folder “Archive”. When you pressed “Sync” on your mobile device – it updated a file here called “All_Routes.gpx” as well as adding each individual route into the folder called “Routes”.
Next navigate into the Routes folder and select the route you would like to import.
Click the “Import” button and the route will be imported into your chartplotter.
Step 4: Viewing and activating routes in your B&G Zeus Chartplotter.
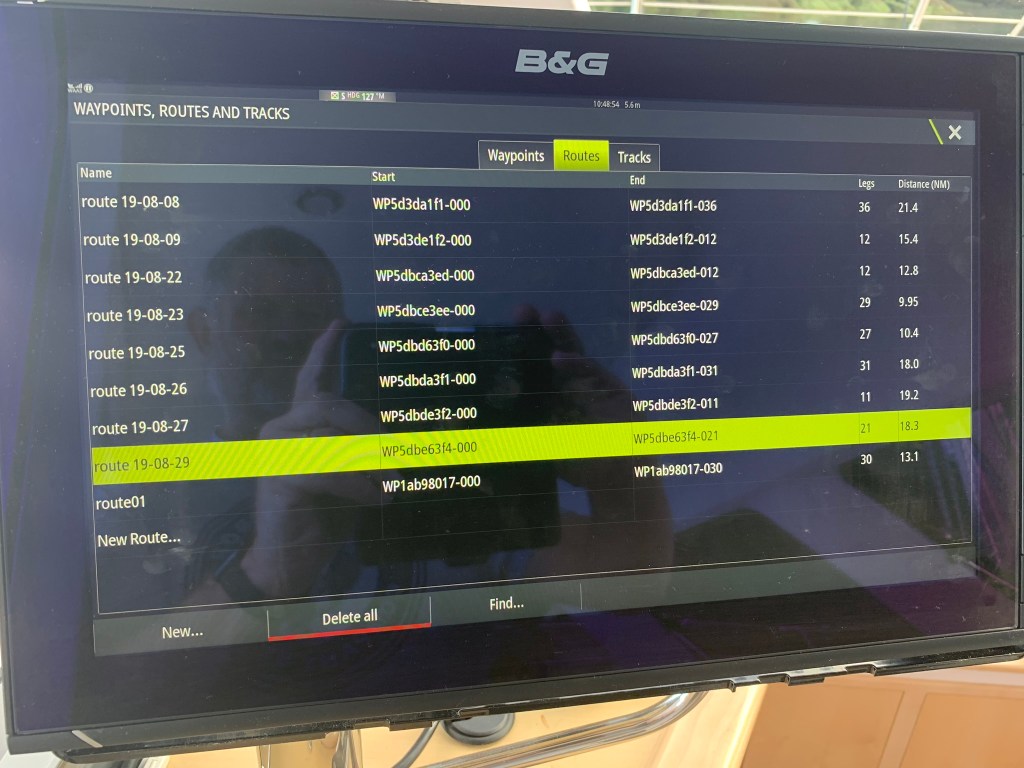
After the route has been imported go back to the home screen on the chartplotter then select “Waypoints” from the menu list on the left of the screen. Next click on the Routes tab on the top of the page and you should see the route you just created somewhere in that list of routes.
Click on the route brings up a summary showing all the route waypoints and a menu item at the bottom to “Start” the route. It gives you the option to start in “Forward” or “Reverse” mode.
I’ve recently had issues with large complex routes causing the B&G Chartplotter to reboot. I’d recommend trying to keep your routes to a max of around ‘200 legs’. The number of legs can be see on the Route summary page. We had a route with 400 legs that caused frequent chart plotter reboots.
Skipping route waypoints.
Something important to note with the routes is that whenever you start a route in the chartplotter – it always from the first waypoint. Normally this is fine – but if for some reason you have already moved beyond the waypoint the “active” waypoint will actually be behind you – which is pretty annoying and poor design by B&G – in my opinion. To get around this you need to “skip” to the next waypoint – and you may need to skip several waypoints to catchup to your current position.
To skip a waypoint – first make sure your chart is displayed and the route is visible on the chart. Next click on the “Options” menu (3 horizontal lines – on second row) on the chartplotter buttons. The third option on that menu will be “Navigation” – click on “Navigation”
Once you have clicked on “Navigation” you will see the navigation sub-menu with the choice to “Skip” a waypoint. You can skip through as many waypoints as you need to catch up to your current location. Be careful as there is no “Go back” option only a restart.
I hope this all made sense – I’ve found it very useful over the past few year. I’m still baffled why they (Navionics and B&G) have not done more to both streamline and document this themselves.
Skipping Waypoints – Update Oct 2022
After a lot of research I have found a much easier way to start a route from a given waypoint. This is really important if you have a long route with lots of waypoints – and for some reason you need to restart your chartplotter.
The trick is to first start the route normally – then find and select the next waypoint. With the next waypoint highlighted go to the Navigation Menu – and you should see an option listed to “Start from nnnWaypoint” – and click on that. That will jump you forward to that waypoint.
Shocking UX design by B&G – but much nicer than clicking through lots of older waypoints.
B&G make some of the best instrument systems used on sailing boats – but the lack of documentation on how to configure and use them – particularly some of the more advanced features is very frustrating.
I have a new (April 2019) Seawind 1260 catamaran and have been cruising in the San Juan Islands in WA (Pacific North West). I was noticing that when I tack the TWD would often change 30-40 deg after I’d tacked. Tides and currents are quite strong here in the San Juan Islands – often 4 to 5 kts. I suspected that both TWD & TWS were being calculated using boat speed (speed through water) and heading – not speed over ground (SOG) and course over ground (COG). In other words – the local current was not being factored into the calculation of True Wind Direction and Speed.
(The wind instruments on the top of your mast measure Apparent Wind Angle (AWA) and Apparent Wind Speed (AWS) – True Wind needs to be deduced factoring in the speed and direction of the boat – and any currents. )
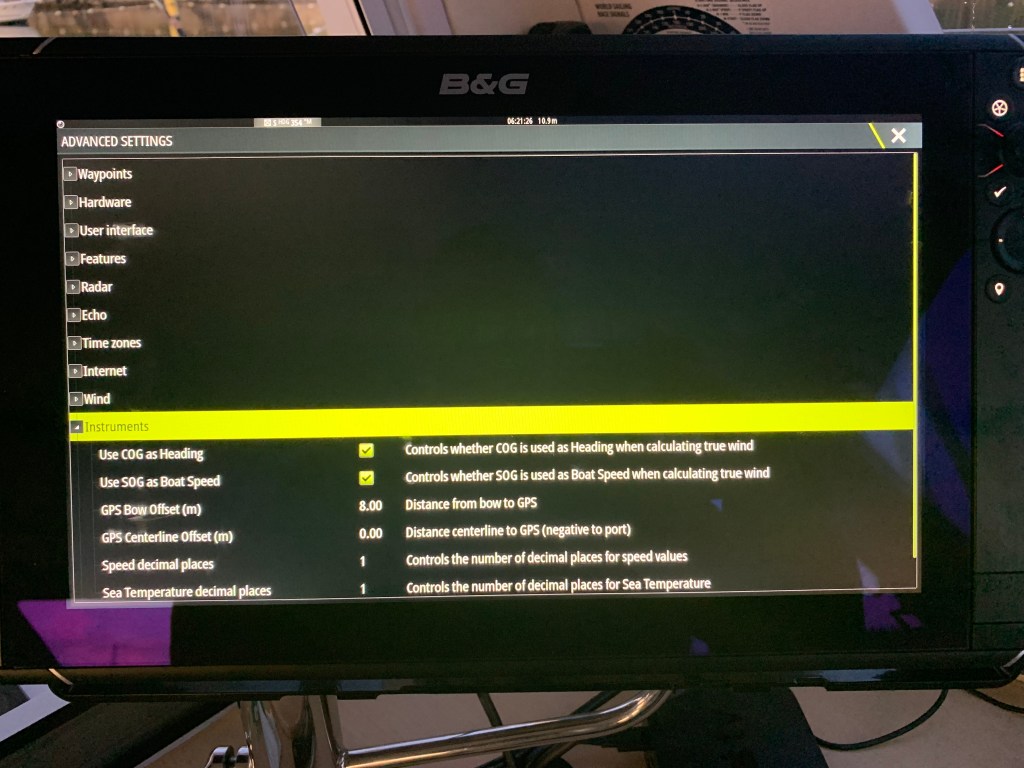
After a lot of digging I found two settings under Settings/System/Advanced/Instruments :
“Use COG as Heading”
Controls whether COG is used as Heading when calculating true wind
Use SOG as Boat Speed
Controls whether SOG is used as Boat Speed when calculating true wind
In my case both of these were off. When I tried changing them the first thing I noticed was that my boat speed display on all my various dashboards was now identical to the SOG number. This was annoying as previously the boat speed display had shown my speed through the water – and given the strengths of the currents in the area – its really helpful to see both speed through the water and speed over ground. Fortunately I had spent some time configuring dashboards – and had noticed that under the Speed/Depth values there is both a “Boat Speed” and a “Speed through Water” inputs. My dashboards were all displaying “Boat Speed” to display “Speed Through Water” – but obviously changing the “Use SOG as Boat Speed” to calculate true wind changed this. I switched all my dashboards and instrument displays to use “Speed through Water” which correctly displays the “Speed through Water”.
Enabling the “Use COG as Heading” and “Use SOG as Boat Speed” immediately stabilized my TWD & TWS values. Now I can tack and the wind direction remains reasonably consistent.
Update 1 – 2019: After trying this for a while I noticed that the True Wind Angle (TWA) became inaccurate. TWA needs to be relative to the boat speed and direction through water – not speed & heading over ground. In the end I decided TWA was more important – so disabled “Use COG as Heading” and “Use SOG as Boat Speed”.
I’m still blown away that none of this is documented by B&G and important settings like this a buried in a completely random and difficult to find location. For sailors & cruisers this seems to be quite important setting – and seems to be turned off by default. Please join me in lobbying B&G to put more effort into improving their documentation. You would think that they could at least add a searchable community knowledge base so material like this could be shared.
Update 2 – Aug 2023: I have done lots more research into this as it is a very confusing topic. What I have realized is there are actually 3 different types of wind angle you need to consider. These are:
Apparent Wind:
(Boat) True Wind:
Ground Wind:
The difference between Boat True Wind and Ground Wind is driven by the strength and direction of the current you are sailing in. In the San Juan Islands where I was sailing in 2019 – this is a really big factor. Obviously – if you are sailing in an area with little or no current this discussion is irrelevant.
I put this diagram together to illustrate all these different ways of viewing the wind.
If you switch your B&G Instruments over to use both SOG and COG to calculate True wind – you are changing the system to really calculate the Ground Wind direction and it will give you an accurate TWD – but as I discovered the TWA will probably be incorrect due to the fact that your heading and COG are different – so your boat is twisted relative to COG and in fact TWA is a much more important value for sailing – particularly when racing.
Ockram instruments have some excellent articles that explain this is greater detail that are worth reading:
In summary using Speed Through Water and Heading gives you a better understanding of the wind relative to the boat & your sails – so pretty important if you are racing. If knowing reasonably accurately TWD – and how its changing then using SOG & COG will provide an accurate picture – but your TWA information – which is used in polars will not be accurate.
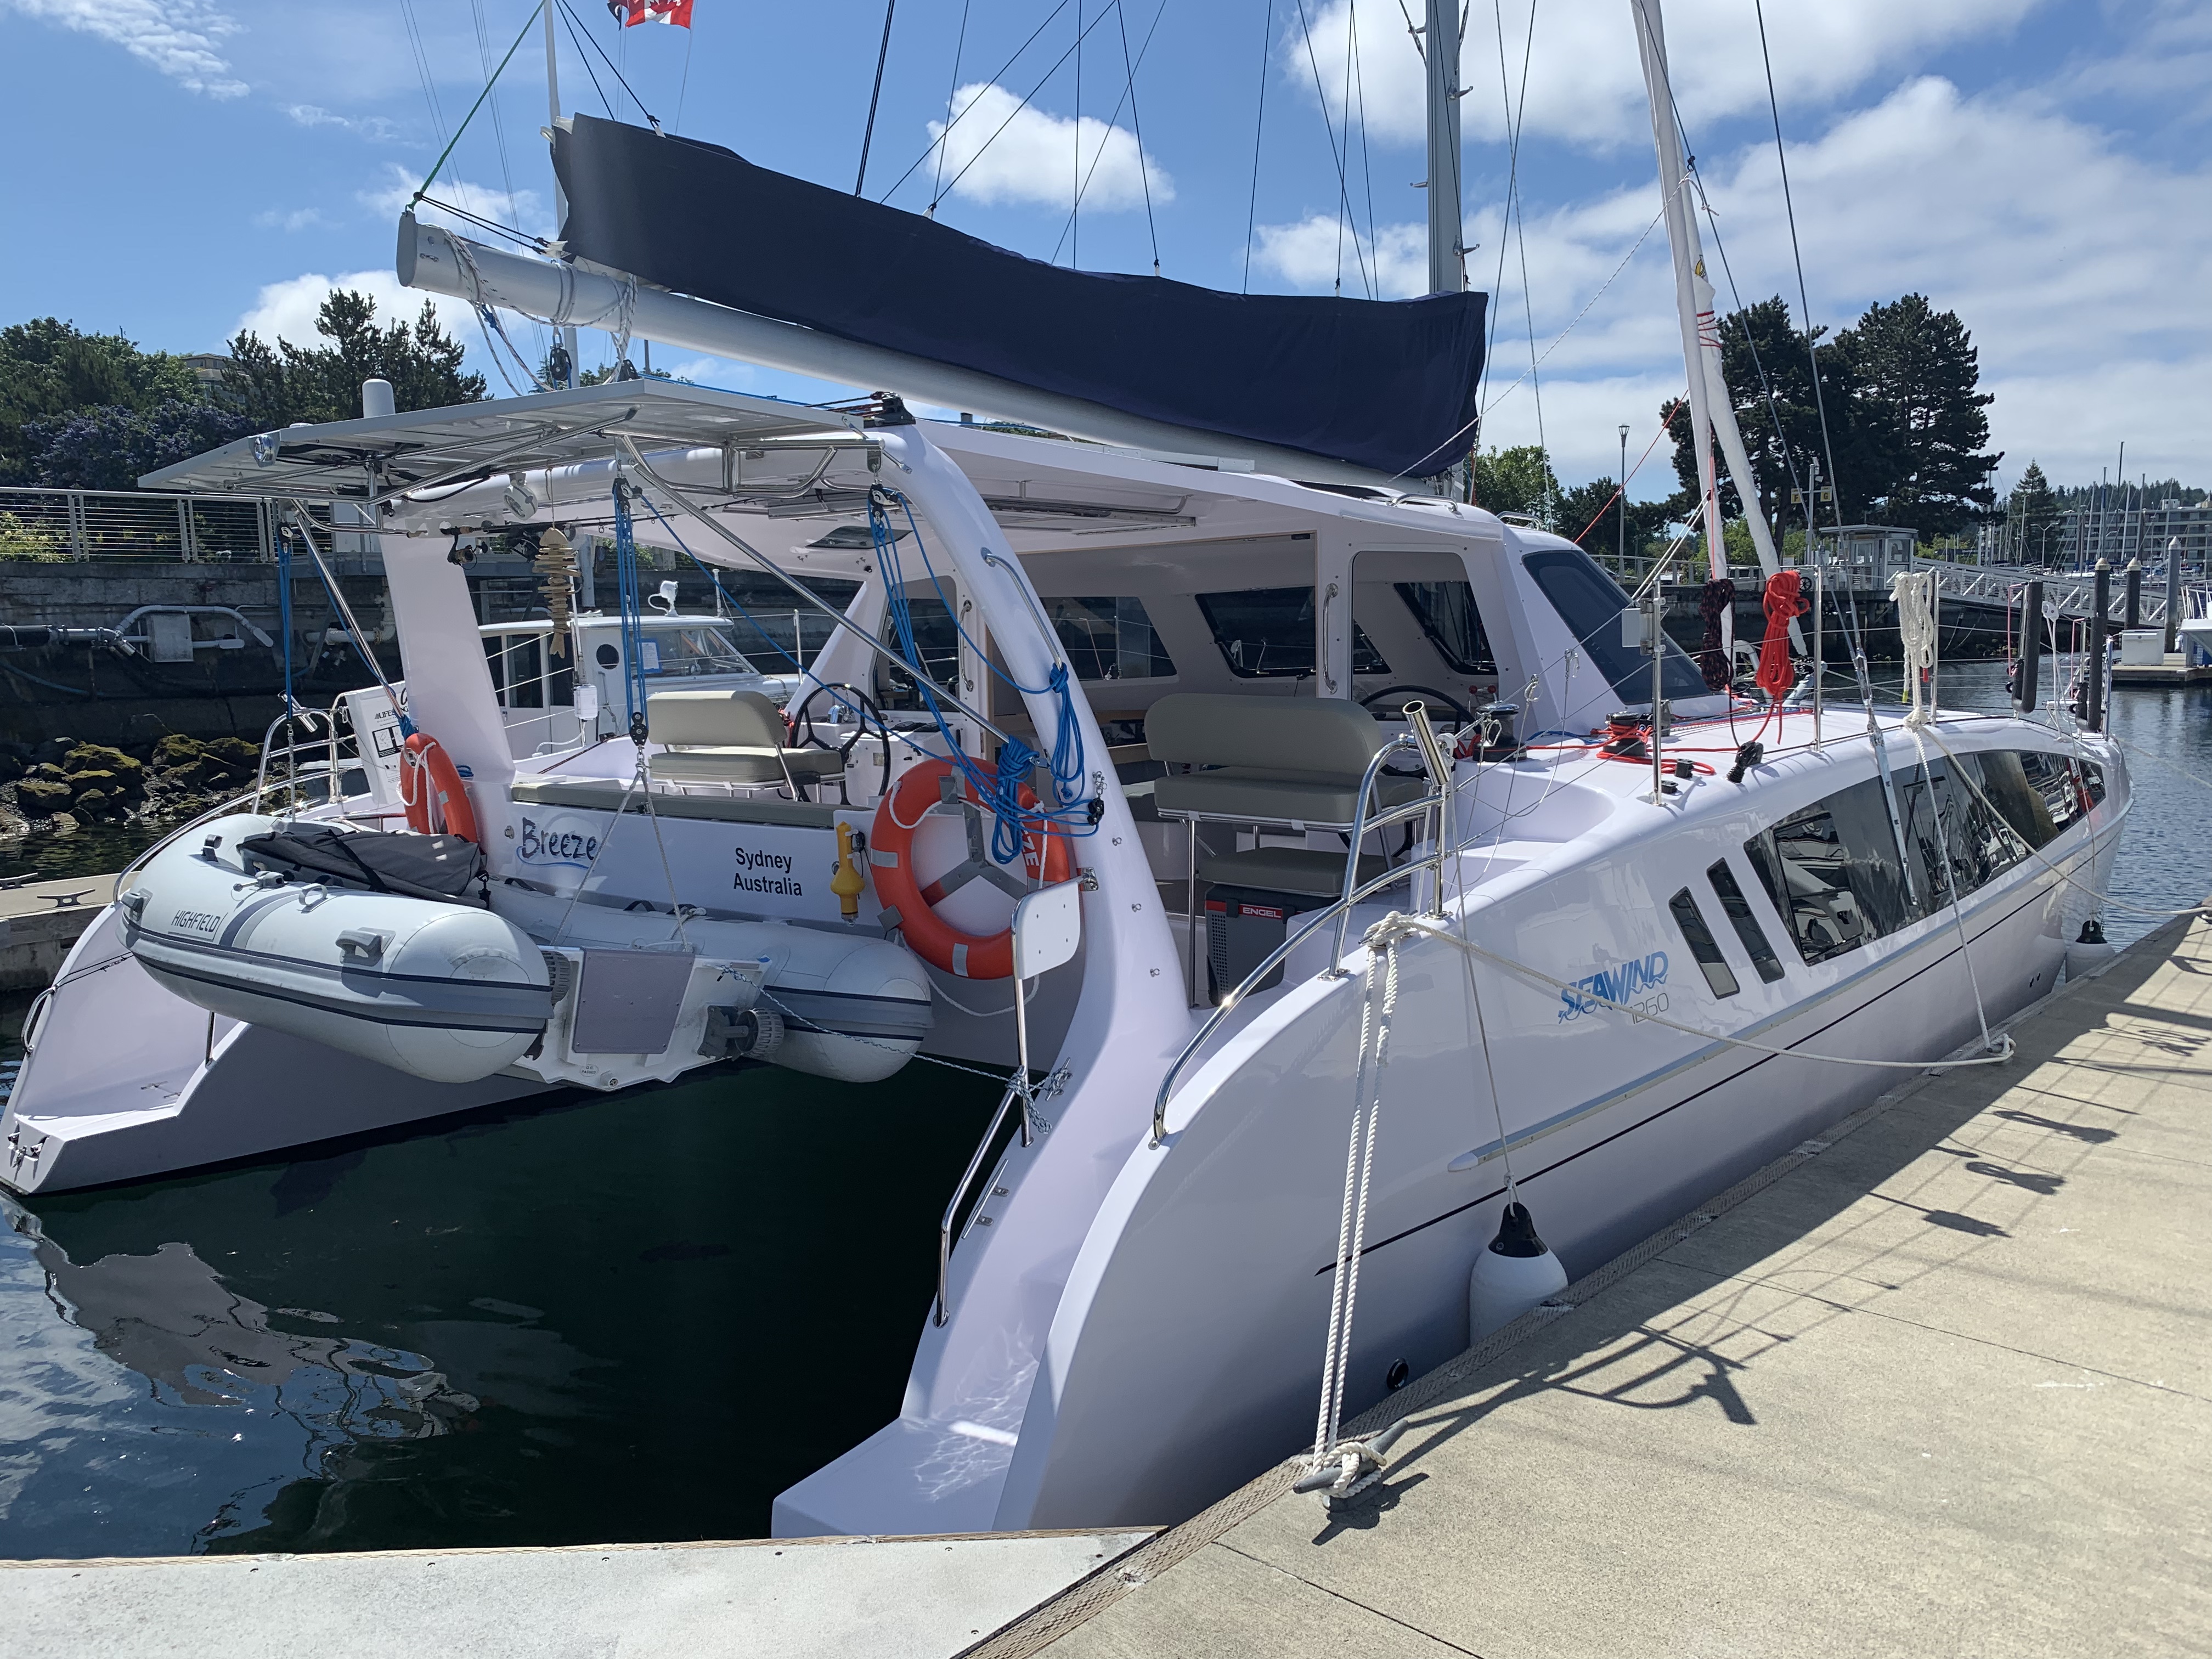
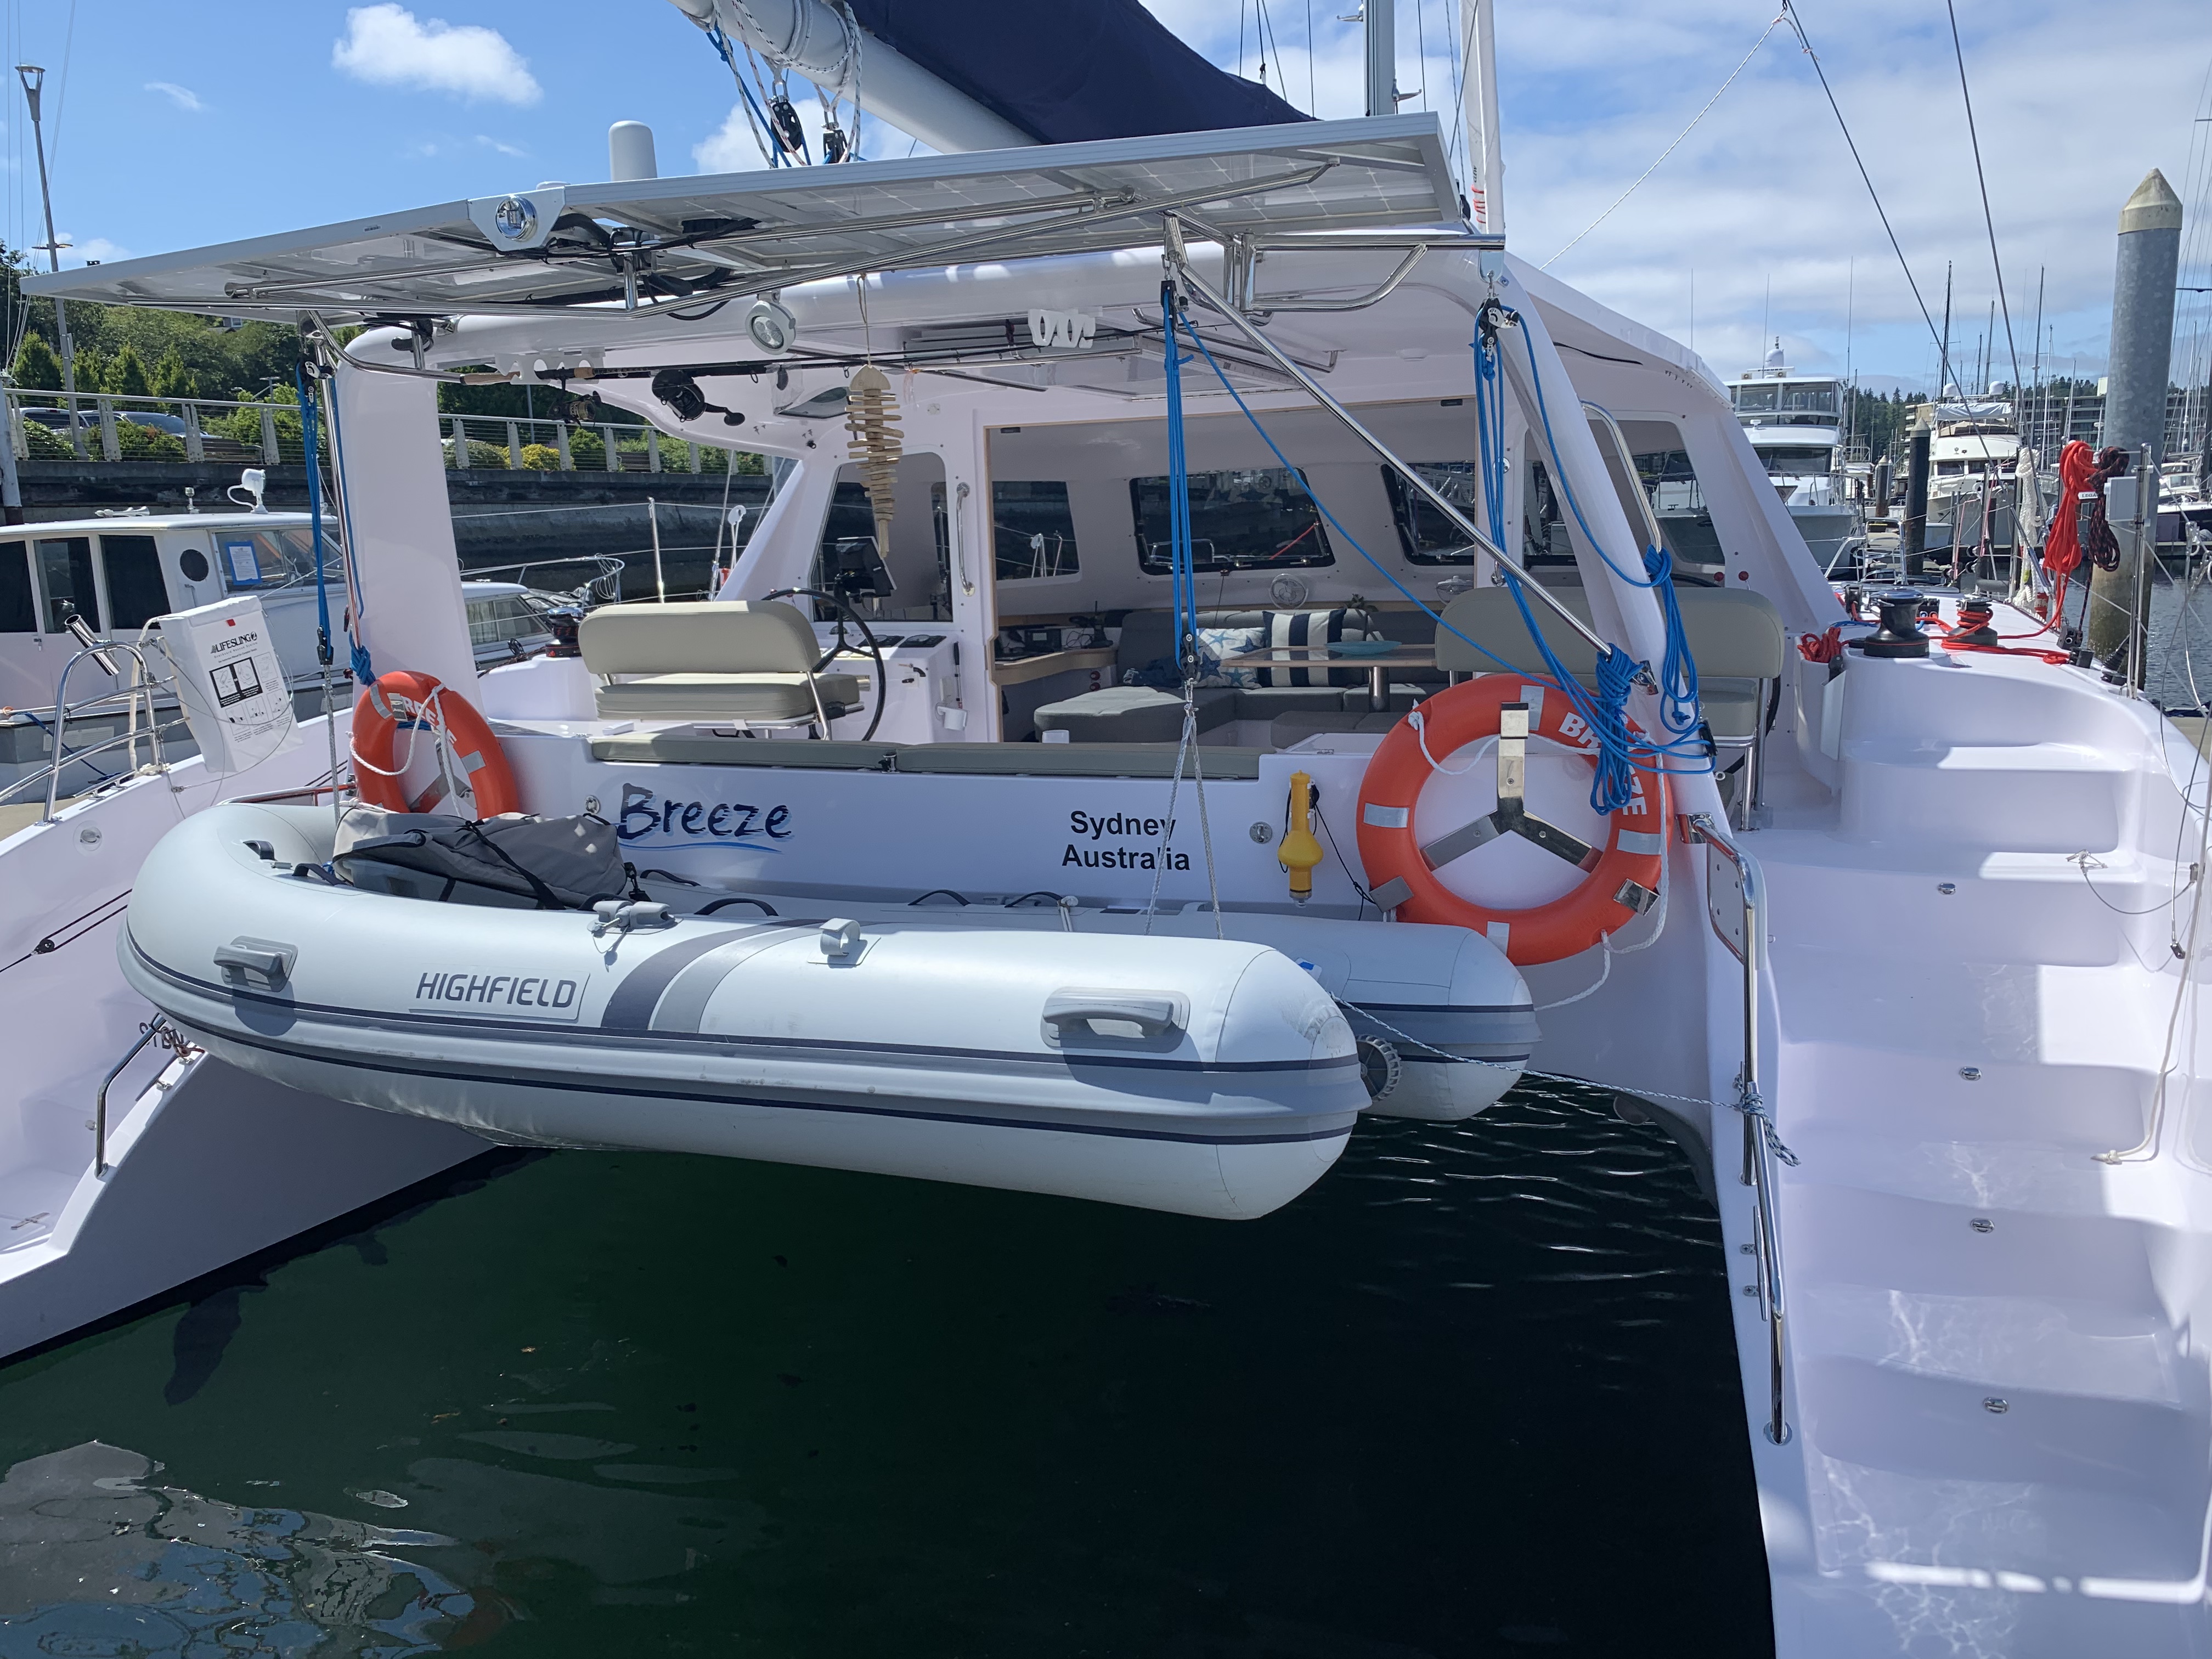
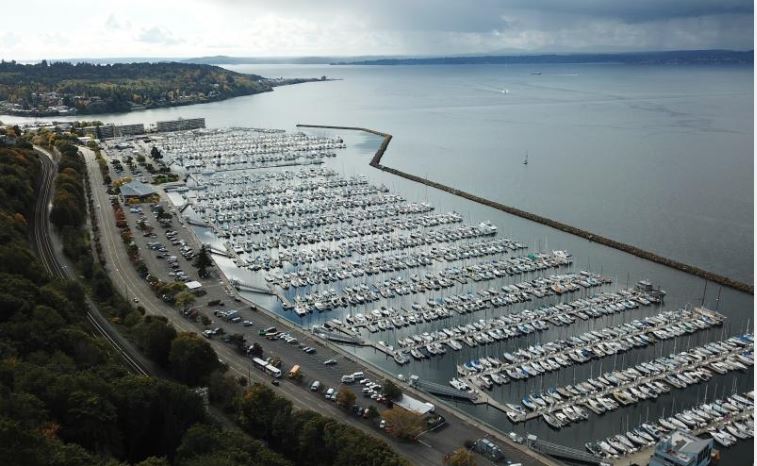
The marina we’ve been using in Seattle – Shilshole Bay held an open day on Sat June 8. We exhibited there in conjunction with the local Seawind deal Wright Yachts. Here are a few pictures from that event.
Shilshole Bay marina is located in Ballard – just to the north of Seattle.
Ballard is very similar to some of the older harbor-side suburbs in Sydney such as Balmain. It’s the home of a very large fishing fleet – many of the boats seen on the TV show “The Deadliest” catch are based in marinas scattered around Ballard.
Our boat “Breeze” is a Seawind 1260 sailing catamaran. It was built in Ho Chi Minh city Vietnam and launched in March 2019. You can learn more about the Seawind 1260 on the Seawind website – www.seawindcats.com.
This is a nice video walkthrough of a 1260 that does a very nice job of showing off some of the key features.