Replacing a broken reefing line on a Seawind Catamaran

I have had to replace a broken reefing line a few times now – twice on my 1260 and recently on our new 1370. The hard part is feeding the new reefing line through the boom – and particularly getting it through the correct channel at the mast end of the boom. It took me quite a while to figure out how to do this – but eventually came up with a technique that seems to work.

At the neck of the boom – there are 3 separate channels with dividers that run inside the boom for aprox 200-250mm. Each reefing line runs through one of these channels. This means that you cannot simply attach a mousing line to one of the other reefing lines as the mousing line will be pulled through the incorrect channel. What you need to do is somehow feed a mousing line inside the correct channel – then ‘hook’ it back out through one of the other reefing line channels – so it can then be tied off on that reefing line – then pulled through the boom.

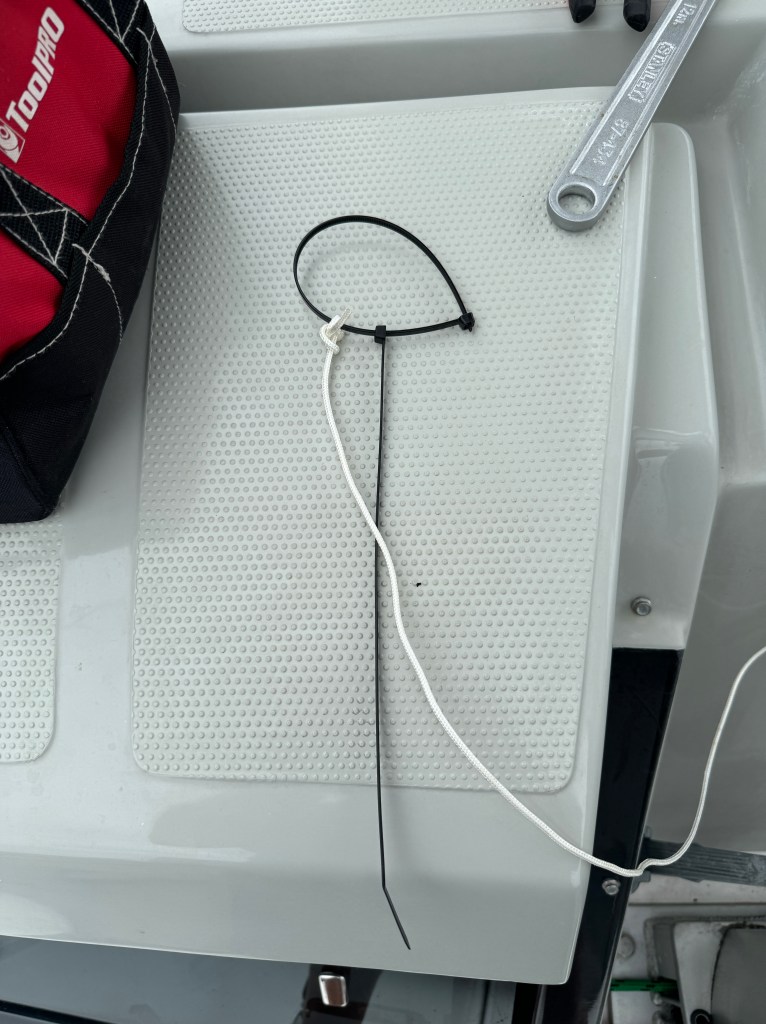
First – I created something that I could insert down one of the channels with the mousing line attached – that I could hook and pull back out the next channel. I used to large 12″ cable ties – which are ideal of this purpose.

The rest is pretty straight forward – simply pull the reefing line through the boom with the mousing line attached – you need to remove the blocks at the stern end of the boom – and use your hook to fish out the mousing line.

Good luck – hopefully this helps.

I did have a very long electrical cable mousing device with me on the 1370 but we were not able to get that past several of the obstructions inside the boom – despite trying for several hours.

Setting up a B&G Zeus Chartplotter

Here are a few useful settings for configuring your B&G Zeus Chart plotter. In no particular order:

Chart Look Ahead

View a chart – then select the Options menu – More Options – and select Look Ahead. This positions your boat so that the majority of the chart displays information in front of your boat – rather than the default showing your boat in the center of the display.

Align your Radar

Settings Radar Installation Adjust Bearing Alignment. Ideal to do this when you have a few AIS targets nearby – so you position the radar image directly over the AIS target.

Chart Extension Lines

Settings Chart Extension Lines. If I am cruising I like to have my boats extension lines set to 30min – and same for other vessels. I also like to display both Heading and Course over Ground. The difference between the end points of Heading and COG is the speed and direction of the current.

Set Autopilot to continue current course when engaged

The default setting for the B&G Autopilot is to “Center” the steering when the Autopilot is engaged. This can be pretty annoying as often this changes your current course by 10 to 15 degrees. I always change this setting to “Actual” which keeps the current course.

Setting is Main Menu – Settings – Autopilot – Steering – then the setting is under both Low Speed and High Speed – Init Rudder.

Other Items

Its really worth calibrating both the Heading and Speed Log. These settings are found under Main Menu – Settings – Network – Calibration. I have a separate post on calibrating boat speed which can be found here https://copelands.blog/2023/03/11/calibrating-boat-speed/ .

I’d also encourage everyone to read the article on syncing a route from the Navionics App on a phone or iPad to a B&G Chartplotter. I plan all my routes using the Navionics App then sync it each morning prior to heading off. https://copelands.blog/2020/10/19/send-a-navionics-route-to-a-bg-zeus-chartplotter/